Saturday, December 22, 2012

Christmas Cookie Love

Two thumbs plus two fingers up from the kiddies
After a disastrous lebkuchen incident a few weeks ago which resulted in two trays of dry inedible fruitcake-like garbage getting dumped in the trash, I decided to give the Christmas cookie baking another go. The husband had several colleagues that could use a little thank you treat, and I figured between the neighbors, mailman and UPS delivery guy, I'd be able to offload most of them before gaining too much weight.

Baked goods never last long in this house because no member of my family has any willpower when it comes to things containing sugar, butter, and flour, so having an exit strategy was important.

There's just something so Norman Rockwell and perfectly wonderful about a kitchen covered in powdered sugar dust and the smell of cookies baking in the oven...Christmas music playing in the background (a combination of Michael Buble's Christmas album - my choice - and Grandma Got Run Over by a Reindeer - the boys' choice)...sticks upon sticks of butter sitting out on the counter in preparation for getting whipped together with cups upon cups of sugar...piles of Hershey's kisses separated from their silver wrappers...and a huge bowl of green frosting with tiny finger swipes along the edge (he was just making sure it tasted good).

The best part of Christmas cookie baking these days, though, is the joy of sharing something I love with the kids and watching them love it too. Merry Christmas to all!

Tuesday, December 18, 2012

The Best Banana Chocolate Chip Muffins

Cooking for my kids is, um, a challenge. I've spent a lot of time and effort trying to hide pureed butternut squash, carrots, and spinach in a variety of sweet and savory dishes in an attempt to get more vegetables in their diet. And mostly it's been a big fat failure. So when I am fed up with the wrinkling of noses, "how many bites do i need to eat?" questions, and other terrorist negotiations, this is the recipe I make that is guaranteed to please everyone - these banana chocolate chip muffins. Yes, I know what you'll say. There are chocolate chips in these muffins. And sugar. Of course they will eat them. But sometimes you just need the satisfaction and smiles (not to mention the smells) that come with a big batch of banana chocolate chip muffins fresh out of the oven.

The Best Banana Chocolate Chip Muffins
Ingredients:
1 3/4 cups all-purpose flour (use whole wheat if you want them healthier)
3/4 cup sugar
1 teaspoon baking powder
1/2 teaspoon salt
1 egg
1/2 cup vegetable oil
1/2 cup plain yogurt (or substitute apple sauce)
1 teaspoon vanilla extract
1 cup mashed ripe banana (2-3 bananas, depending on size)
3/4 cup semisweet chocolate chips

Directions:
1. Preheat oven to 350 degrees. In a large bowl, combine dry ingredients through salt.
2. In a medium bowl, combine egg, vegetable oil, yogurt and vanilla extract.
3. Add wet to dry and fold to combine.
4. In bowl used for wet ingredients, mash banana. Add banana and chocolate chips to large bowl. Fold again to combine. The mixture will be very hard to mix, but the moisture from the banana will help once that's combined a bit.
5. Fill paper lined muffin tins 2/3 of the way full. Bake for 22-25 minutes until done (toothpick comes out clean). Muffins will be lightly browned on top.
6. Let cool for 10-15 minutes before serving. Store in airtight container on counter for up to 3 days. (These freeze great too!)

Monday, December 10, 2012

Roasted Carrot Soup Rocks the House

Roasted Carrot Soup with Dukkah Spice
and Yogurt
These days with email, facebook, and blogs, there is not much reason to get excited about picking up the actual US Postal Service mail - except for the magazines. Even though I spend a certifiably crazy amount of time reading food blogs and recipe sites online, there is just something about getting that Bon Appetit magazine in the mail that I still look forward to every month.

There are always at least a half dozen recipes I mark to try and make, but last month's picture of this Roasted Carrot Soup with Dukkah Spice and Yogurt was so gorgeous and simple that my mom and I ran out to the grocery store within hours to try and replicate it - and it was as good as it looks!

We made the spice mixture a few days in advance and the recipe made plenty - enough for another pot of soup, which I just might make again today, now that I'm looking at this picture and remembering how delicious it was. Yum. Toasting the spices first in a dry skillet helps bring out the flavors, so don't skip that step. The recipe calls for either using a food processor or a mortar and pestle to grind the spices and I'd have to recommend the food processor. We used a mortar and pestle and I did end up with a rather unpleasant chunk of black peppercorn that I could have lived without. Just add the roughly chopped pistachios afterwards for textural contrast.

Roasting the carrots was as easy as could be - just peel, roughly chop, toss with butter and throw them in the oven until they lightly caramelize. Puree with a carton of vegetable broth (or use homemade if you have more time on your hands than I do). Top the soup with a dollop of Greek yogurt (I like Fage 2% the best) and a few pinches of the spice mixture and enjoy! The soup is warm and comforting on it's own, but the addition of the yogurt and spices really adds something special. Serve it with a crusty baguette for an easy weeknight meal or the beginning of an elegant dinner party. Leave me a comment if you try it and let me know how you like it! You can find the recipe here.

Sunday, December 2, 2012

Channeling a Little Italian Grandma

A few weeks ago I assisted in a Gnocchi 101 class at the cooking school and ever since then I've been dying to try and make the little potato dumplings myself. The chef made it seem so easy, but having eaten my weight in chewy, disappointing gnocchi over the years, I had serious doubts that I could produce anything edible on my first try.

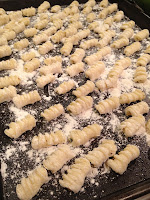
Pan of uncooked gnocchi
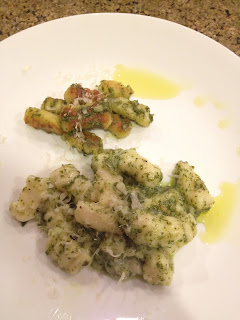
Now I'm not saying that Mario Batali would be impressed with the results, but they got a thumbs up from the husband and I thought they were pretty darn good. Not even a little bit chewy. I pan seared half the batch and boiled the other half and served both with a basil pesto. The boiled batch didn't hold it's shape as well as the pan seared, and I think that may have been due to not using enough flour, though I'm not sure. I'll have to let you know after the next attempt.

The key to gnocchi that is light and fluffy, says Chef Tom, is two-fold. First, prep the potatoes in the food mill as soon as you can handle them out of the oven. The more time the potato has to cool down, the more the texture will change. Second, handle the dough as little as possible - just until it comes together and not a second longer. The recipe is below in case you want to try this simple, delicious, and very rewarding meal. Buon Appetito!

Potato Gnocchi (from Chef Tom Hughes)
1 lb. russet or yukon gold potatoes
1 egg
1 cup all purpose flour
1 tbsp. salt
1 tsp. pepper
1/4 cup chopped herbs (parsley, thyme, etc.)
1/4 cup olive oil
Tools: food mill or potato ricer, bench scraper, fork for rolling gnocchi

1. Preheat oven to 350 degrees F. Coat potatoes in olive oil, salt and pepper. Bake for one hour or until soft.
2. Cut potatoes and scoop out the insides and then push the inside of the potatoes through a food mill or potato ricer.
3. On a floured cutting board, pour the potato, eggs, salt, and pepper and 1/2 cup of the flour.
4. Using a bench scraper, cut the pile of ingredients until the mixture begins to come together. Add more flour as needed so you can easily handle the ball of dough.
5. Roll the dough into a snake and using the bench scraper, cut the snake into 1-inch nuggets. Roll them lengthwise off the end of the fork to give them proper shape.
6. At this point you can freeze your gnocchi for up to a month, or cook them in boiling water until they just begin to float. Remove from water and toss with sauce.
7. If you wish to pan saute them, add olive oil to medium high pan, add gnocchi and cook for a few minutes on each side until lightly browned. Then toss with sauce.